How To Make a Bird Table
Knowing how to make a bird table might seem like something of a niche interest. However, we would honestly swear that not only is it enjoyable to create a bird table in your home, but it can be really useful in your garden, as well as providing something beautiful to look at.

Your Own Bird Table
Creating your own bird table is something of a dream for a number of bird watchers and carpenters. The truth is that it really isn't as complex as you might think it is.
At the end of the day, no birds are going to criticise your table. As long as you look at it and find a little joy, then you can be sure it will be great for your garden.
The first step to creating your own bird table is one that you've already accomplished - wanting to make it happen. So, with dedication in your heart and skill in your fingers, let's make a bird table!

Bird Tables
Bird tables themselves are a simple thing, and for good reason - they don't need to be complex.
Perhaps the most simple table that you can conceive of would include only two pieces of wood - a flat surface for seeds and birds to sit upon, and a rod to support the table itself.
This is a great way to get to feeding birds quickly and easily, as you're quickly and easily creating a simple bird table. On top of this, the process is simple to boot.
For a simple bird table, all you'd need is a small bag of wood screws. For a more complex affair, you might need cutting implements, wood glue, and other items that would allow you to create an elaborate and specifically designed bird table.

Circular Saw
While you can always use hand tools to create any amount of carpentry-focused items, power tools will always make the process much easier and quicker.
There are very few other examples of that than when it comes to a circular saw.
A circular saw is a very simple tool that just replaces the hand saw that you might have in your toolbox. It makes cutting less labor-intensive for you, and it also ensures that you can make straighter cuts. A straight edge is important for something as square as a bird table.

How tall should a bird table be?
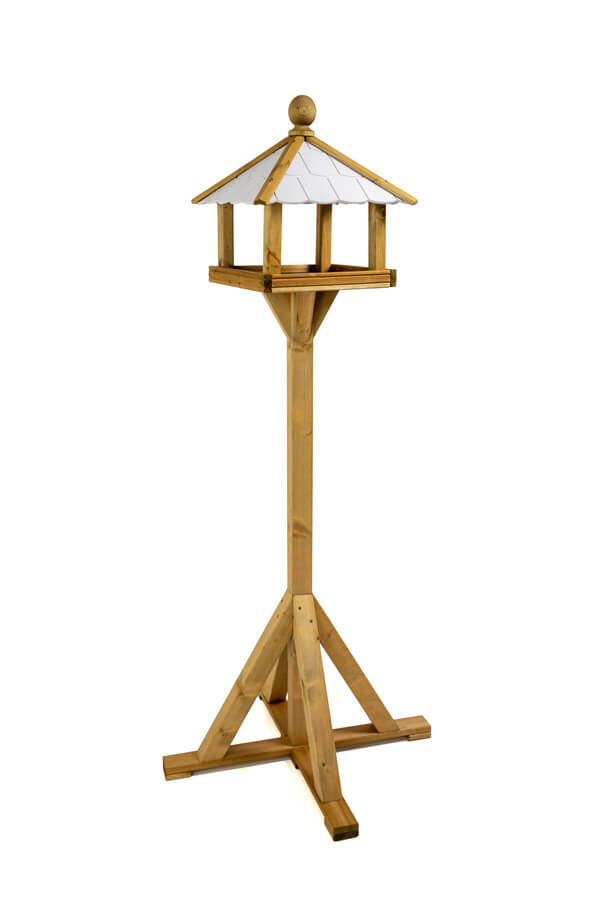
A bird table's height can be anywhere within a general range of four to six feet. When considering how to make a bird table, this is important for the height of the stand that you might create.
There are two real factors that you ought to consider with regard to the height of a bird table.
One of them is the fact that a bird table should be easily reachable for anyone that needs to regularly stock and clear it.

This typically means that you ought to make bird table plans with some level of accounting for a human-sized person emptying a bag of seed onto the table.
However, you could also consider placing the bird feeder table next to a firm piece of ground that would allow you to stand on a small stool to reach it.
The second thing that you might want to consider is the changes of predation upon any birds using the bird table. Part of knowing how to make a bird table is knowing how high to make the table such that there won't be any major predators leaping for birds all day long.

A good thing to consider, on this front, is the nature of the agility level of cats in your neighbourhood. For example, if the cats in your neighbourhood are particularly aggressive and agile, then aiming for a bird table up to six feet high might be ideal. Alternatively, a lower bird table may be easier to construct and maintain if you don't have to worry about predation.
What is the best design for a bird table?
This depends rather a lot upon what bird table design you prefer. At the end of the day, any birds in your neighbourhood will be thankful to track down a source of bird seed that they can eat at any time. Therefore, all the components that make it look pretty are really just for you.
With that said, however, there are a few things we would recommend.
First of all, we would recommend a table leg or stand that has an extra foot or so of length. This will allow you to bury the base of the stand in the ground of your garden, allowing you to rest assured that it certainly won't fly away at any point.
Secondly, we would recommend having a wide feeding base with enough room for several different garden birds to eat at once. This will ensure that you get as many birds on the table as possible at any one time, allowing you to enjoy the table that you've created.
Finally, we would recommend some form of roof. The specific shape that the roof panels take is up to you, but some shapes that will allow you to keep water away from the seeds on the surface of the table will be ideal.
The reason for this is that water and seeds mixing is liable to simply create a sloppy mush on your bird table that will be unappetising to birds, and difficult to clean.

How do you make a bird table pigeon-proof?
The simplest way to make a bird table pigeon-proof is to use some kind of wire mesh, for example, chicken wire.
Stringing the mesh up across any openings in the structure of your bird table will allow you to ensure that small birds can get in, while pigeons cannot.
If you've created a bird table with a roof, then fixing the mesh to the floor and ceiling is the simplest way to secure it in the exact space it's meant to be in.
If you've got a bird table without a roof, though, creating some form of the dome may be better. This can then be secured to the base of the table, allowing only small birds access to the entire table, while pigeons can only access the outer edge.
Something to be wary of with chicken wire, or other wire mesh, is sharp edges. If the holes in the mesh are 4cm or bigger, then birds can happily fit through. If the wire is sharp and fine, though, then they won't be able to fit through happily - they're liable to get hurt on their short journey.

How to build a bird feeding station?
Knowing how to build a bird table is simple and straightforward, thankfully. The basic steps are thus: design, cut, and secure.
First things first, you need to design the bird table that you're creating, from the exact shape of the flat feeding surface to the height of the table leg itself. Once you've got these measurements down, you can go to a hardware store and select the wood that you'll be using.
Picking out wood is a simple process, as nearly any wood will work fine for a bird table. Once you have it, therefore, cut the wood to size. If you've bought a larger slab of wood than you would otherwise want for the flat surface, then you'll need to trim it down. If you've bought slim planks of wood, you'll need to trim them into certain lengths to be secured alongside one another.
During this cutting phase, drill pilot holes. A pilot hole is a small hole drilled through a piece of material that will guide the screws used to secure it in place. For example, you could drill a small pilot hole (thinner than the screw you'll be using) through the roof panel and into a support strut for the panel.
Then, when you come to screw the two pieces together, the screw will already have a designated spot - just like assembling a piece of flat-pack furniture.
After the cutting phase, use wood glue and screws to secure everything together. This part of the process is typically the most satisfying, as it allows you to ensure that you can create a strong, stable product that will last a long time.
Be sure to test wood glue on a small piece of scrap timber before use, and do the same with a spare wood screw. This will allow you to ensure your bird table is as secure as possible.

Adding a lip to platforms
Adding a lip to platforms on a bird table can be a real boon to prevent squirrels from eating the seeds and nuts that you might leave out for birds. The reason for this is that while squirrels are powerful climbers, they need some kind of textural or structural shape to grip onto.
If all you offer them is a flat piece of wood, they won't be able to climb it for too long.
Therefore, a lip of wood around the rim of any flat tabletop can be ideal for ensuring that the squirrels cannot access your birds' food.
Consider a roof
The specific shape and size of the roof is the thing that you'll need to consider most of all when crafting a bird table. We would certainly recommend that you include a roof on your bird table, as it will allow you to protect birds and bird food alike from the elements.
The primary thing to consider with a roof is water. The reason for this is that rain will likely be the thing most likely to damage the wood of your table, as well as any food on the table itself. Therefore, make use of wood glue and water-resistant materials as much as possible.
Consider your base
The base of the bird table is also something a little tricky to consider, especially when you might need some level of specialist engineering degree to figure out the exact shape and size of the base for a table of any given size.
For this reason, we would recommend not constructing a base.
Okay, we know that sounds crazy! Instead, it's a sensible idea to bury the bottom foot or so of the pole that you've created as a leg, and use the weight of the surrounding soil to ensure it's upright and steady.
Sanding and oiling
Sanding and oiling wood is typically the least enjoyable part of a woodworking project, but it's also one of the most vital.
Sanding down the surface of a piece of wood allows you to ensure that it is perfectly smooth, especially on any surfaces where you've made cuts. Those cuts can leave splinters in the wood that need to be dealt with for the sake of the birds you're feeding.
Oiling the wood of your project gives it a level of waterproofing and resilience that's excellent for a regularly-used item like a bird table. To be sure that the table itself is in great condition, make sure to re-oil the surface regularly.
What wood should you use?
To be entirely truthful, nearly any type of wood that you can get your hands on will be ideal for making a bird table. Even using excess wood from another project can work well for a homemade bird table.
Essentially, the rule of thumb is this - any wood that won't disintegrate in regular weather will be perfectly fine for a bird table. Generally speaking, exterior quality plywood is considered one of the better options for a bird table, but you can use nearly any option that might be ideal for you.
How to ensure longevity
The best way to ensure longevity is to regularly access the table for maintenance. This might sound a little over the top for a simple project, but it's entirely true. You can also ensure that you use a solid wood for a more heavy duty bird tables and long lasting security.
At least once every six months, we would recommend totally cleaning the feeding table, and re-oiling it at the very least. That will allow it to stand up to the elements a little better, while also making sure that the wood remains in good condition.
Standing or hanging?
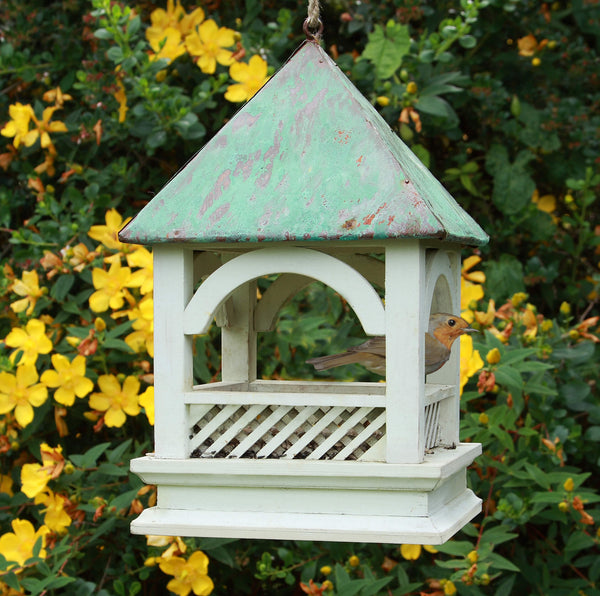
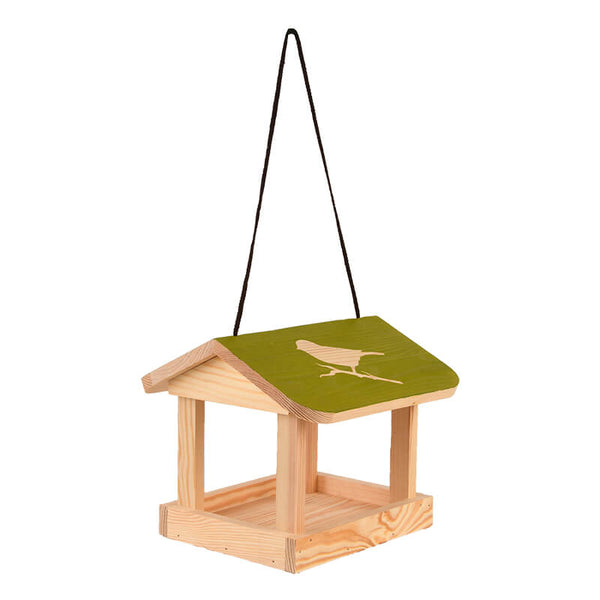
If you're unsure whether a standing bird table would be ideal in your garden, a hanging table can work wonders. They're a little less common than freestanding options, but they can work wonderfully well, with a table dangling off a hanging basket hook easily available to any birds that might be interested.
One benefit of hanging a table in your garden is that you'll be able to naturally attract birds to it by placing it in the flight path. Bird feeders will always entice birds, but by placing a table directly against a wall you know birds use to navigate your neighbourhood, you'll be able to easily encourage birds in your garden.
Painting a bird table
Painting a table might be ideal for making sure that it's as pretty as possible as it stands in the center of your garden. To ensure that you create a small table that will work well for the birds as well as your aesthetic, paint choice is essential.
For instance, you need to ensure you don't select toxic paint, and instead opt for water-based paint or wax-based acrylic paint. These options won't be dangerous for birds and can allow you to create a surface safe for birds to eat fat balls from.
A feeding space on the table
Birds will naturally designate a certain spot as the spot food typically appears. After you've established that spot easily, you can use it to your advantage. Find the middle point of your table, and place a pitched roof over it to provide a safe spot for a bird in need.
Alternatively, you could use some small pieces of scrap wood to create a small 'container' that you can fill with birdseed to allow for a totally contained portion each day. This will reduce mess, which is ideal in most gardens.

Preventing squirrels
As odd as it might sound, preventing squirrels is typically ideal for the home birdwatcher. For instance, squirrels are often desperate to hunt down some tasty food, and there's typically a great source on top of a feeding table.
The best way to prevent squirrels from accessing the food is to make the stake totally unclimbable. Some people have had success with the use of a slinky (yes, the toy) as a squirrel will grab it for use in climbing, only for the spring to extend and drop them down to the ground safely.
Encouraging birds
The best way to encourage birds is to regularly offer dry food and seeds. A pitched roof might help to make sure that the seeds themselves are as dry as possible, while a unique shape, such as a cross shape, can ensure that fewer birds can access the seed at a time, allowing the birds to have a more reliable volume of seeds up for grabs.

Selecting colours
Picking out a colour for a feeding table is typically quite hard since there is often a riot of colours in your back garden that you might want to select from. With that said, though, you can make a good or bad choice.
Never opt for metallic or fluorescent paints - they will be very visible to predators, and may even scare away the birds that you're trying to gather. A great choice would be natural earth tones - these colours will be somewhat camouflaged from predators, allowing you to ensure that the birds are a little safer than they may otherwise be.


